Blinds are easy to make, but I had to figure out a way to attach them to an arched window. I didn't want them to be a permanent fixture, as I change my walls around to make different rooms and the curtains will need to fit the new room's décor.
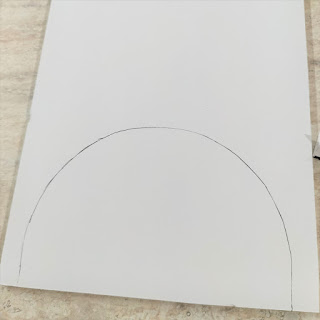
I made a template by tracing around the top of the window frame. I used paper first, then transferred it onto 5mm Foam Board.
Then I cut it out using a Stanley Knife, leaving a 13mm (1/2 inch) boarder. I shall keep the piece I removed as a template for further curtains or blinds.
Then I did a test fit by placing it over my window frame. The total measurement of my blind width will be 18cm (approximately 7 inches).
Hubby cut several craft dowels to the same width for me and I chose a pink and white stripe fabric to match the Kiddies Kitchen décor.
I cut my fabric wide enough to have side seams and long enough to cover the length I wanted, plus hems at the top and bottom.
I like to fold the side seam over once & press, then a second time & press, doing the same to the other side. Then I stitched it down (you could glue down using Tacky Glue if you don't sew).
The rod that goes in the bottom needs to be heavier than the dowels, so I used a small offcut of 5mm MDF. Then I marked the positions of where I wanted the dowels to go, by ironing a crease mark.
I folded the fabric right sides together along the crease marks and stitched across the blind 7mm (about 1/4 inch) below each fold. Then I inserted the dowels. Next I hemmed the bottom and inserted the MDF.
Then I turned the blind over and positioned the loose folds evenly.
Then I added tacky glue to the arch before placing and pinning the blind in position.
I carefully turned the whole thing over and glued down the top. The blind is about a mm or two wider than the arch, so you don't see it when it's up on the window.
The blind in position, in the Kiddies Kitchen. You may notice I have painted the walls pink and tiled the floor since I last shared a photo of the Kiddies Kitchen.
On this blind I stitched some braid trim across the bottom, but I still need to add a pull ring or perhaps a tiny tassel.


Thanks Linda. I'm really happy with the kitchen, I have another wall coming with French doors which I will add to the right hand side of the kitchen. The library is not too far away now, I picked up some paint from Bunnings last night on our way to Jazz Club to finish the final wall. :)
ReplyDeleteThe blinds looks lovely and so delicate! The pinkt-white ones fit the new kitchen perfectly. The ones for the library looks more serious somehow ;)
ReplyDeleteThank you so much Chiriann. I guess a Library is a little more serious so the blind should fit nicely. LOL!
DeleteThese are great blinds. I might have to use your method to try and make some myself if you don't mind. I never know how to make curtains for the windows of my doll houses. Foam board is such a great material. I love how you can use it for anything.
ReplyDeleteThanks Alasse. I please do, it makes me happy when someone else uses my projects as a guide. I am going to make some curtains soon, so I'll share them on here as well.
DeleteI agree, I always have some handy because I never know when I might need it. :)
Great idea with these foam arches.
ReplyDeleteThe kitchen look so wonderful already. I love all the details you add.
Thanks Joanna for your kind comments, it's always good to read positive reactions to my little projects.
DeleteBig hugs,
X
Thank you for the tutorial on making blinds. I've never done that myself, so it was good to get some tips. They turned out lovely; your dolls are getting spoiled. :)
ReplyDeleteYou're welcome Barb, if I've helped you I'm really happy. I've made blinds before, but not for an arched window and they turned out better than I expected. I'm having a lot of fun with these dioramas. :)
Delete