Welcome ~ please feel free to explore, there's lots to discover and I hope you'll come back often.
Showing posts with label Project. Show all posts

Saturday

Project: Making a Doll Mask with Milliput

Milliput is a two-part sculpting medium which air-sets. Working with it can be soft and sticky. However, the final strength when cured, and the ease with which it can be carved, sanded and painted is so worth it.

Materials:

  • a blank doll head
  • plastic wrap
  • aluminum foil
  • Milliput (I prefer the super fine white)
  • sculpting tools
  • dish of water
  • scalpel
  • sandpaper
  • decorative embellishments

Instructions:

1. To protect the doll head, cover with a layer of plastic wrap (so foil doesn't scratch the head) and then press a sheet of aluminum foil over the face to capture as much detail as possible. Bunch the excess foil at the back to form a base to hold the head upright so doesn't roll away as you work on it.

2. Take equal parts of Milliput, cut the same size from the two parts and mix thoroughly until well blended.

3. Flatten the Milliput and position on head where you want your mask (can be half or full mask). Press in place.

4. Lightly cut away excess Milliput, being careful not to cut too deep and damage the doll's head underneath. Cut eye holes. Smooth edges with wet finger.

5. To add flames, leaves or other embellishment, shape bits of Milliput and pressed them along forehead. Let cure for 4 hours, then mark the position of the eye holes.

6. After the it has fully cured (preferably the next day), remove it from doll head. Remove foil and plastic wrap. Using a scalpel carefully carve eye holes so they are the same size and shape. Sand the edges of the mask, paying special attention to the edges and smoothing out any irregularities.

*Note: The inside of the mask is textured from the crumpled foil. If you wish to smooth the inside, thin some Milliput and work it into all the crinkles with a wet finger. To add eyelids to the eyes, roll two small balls of Milliput, flatten and smooth into place. Let cure.

7. Finish by painting and/or blushing with mica or pastels.


Monday

A Change is as Good as a Holiday!

So they say. Do you ever get bored with looking at your own blog? I do and the more I looked at mine, I felt it was time for a change. So today I changed it, which is easy to do with Blogger. With the way I have been feeling lately, I may change it back, or I may design a new one . . . who knows???

Usually when I get this itchy, unsettled, can't concentrate on any one thing, I have a storm brewing in my head. Which means there's a creation coming shortly . . . hmmm, maybe it was the movie I watched again that did it? What do I mean maybe? Of course it was!!


I first saw Avatar in 3D at the cinema when it was released, I was in awe. It was the only time I have been to the movies with hubby that we never spoke a word to each other all the way through. I have watched it several times since on DVD and we've also been to see the sequel, which I found just as inspiring.


Watching it again was the perfect motivation for me to order a Resinsoul Mei in Sky Blue resin. I didn't order her with a faceup as I normally would, because I want to create my own version of a Na'vi woman. Someone created from my own imagination, not simply a recreation of those I saw on the screen.

I have previously spoken about ordering Mei on my other blog, and thought I could put the idea on the back burner until she arrived. That however, is not the case and I can't help thinking about what I want to do. Mind you, finding a great selection of digital backdrops on Etsy hasn't helped calm my mind one bit.


If anything, it's made me worse, and I can't wait to get started. Though I may be able to settle myself by doing a few preliminary sketches . . . sometimes putting pencils to paper helps. At the very least it will occupy some time whilst I wait for Mei to be delivered.

Wish me luck, I'll be back in a few days.

Friday

Project: One Bed for Three (Part 4)

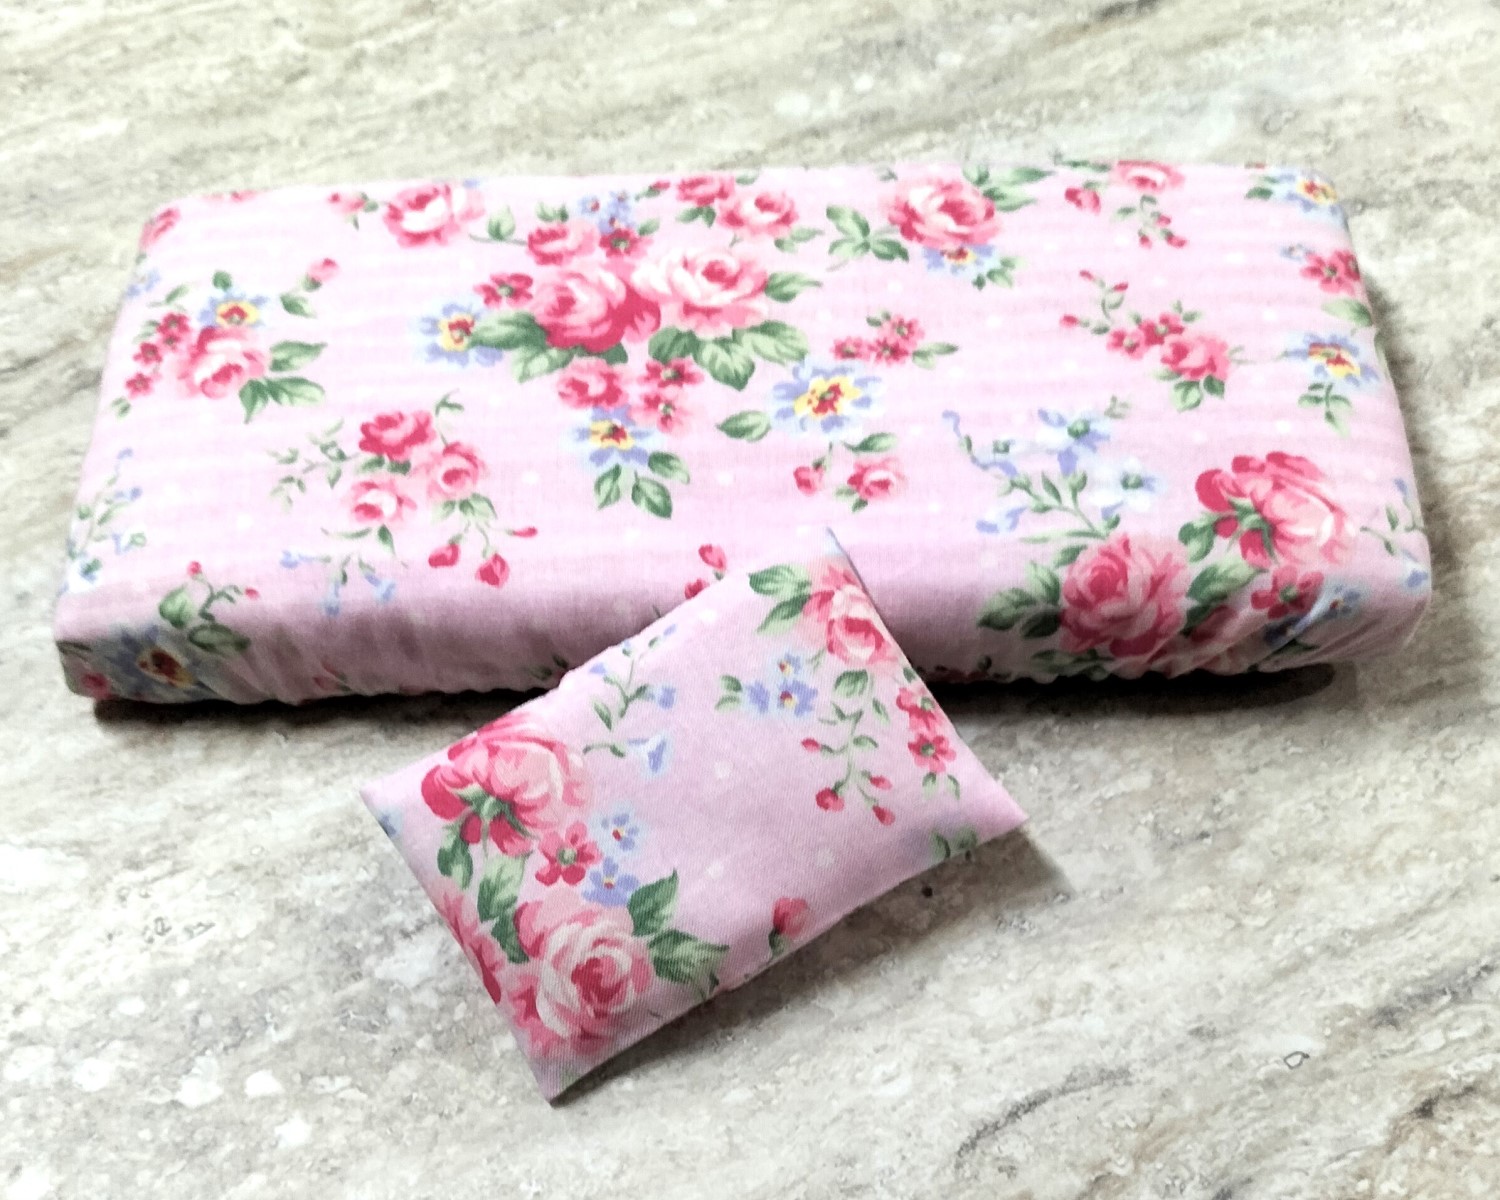
Today I began making the bed linens. Firstly I wanted to make some fitted sheets and pillows and began by selecting a pretty lightweight cotton.


After cutting my pieces to size, I made the pillow cases. Then rather than making the fitted sheet like one would for a real bed, I simply drew around a glass to curve the corners. 


I turned over approximately 1cm around the outside and ironed it down, before stitching it to make a casing for the elastic. Then I inserted 5mm elastic and pulled it up so it fitted nicely over the mattress.


I tossed up the idea of making flat sheets with blankets or duvets. I settled on the duvets.


This photo was taken before I added the decals, so you'll deduce I didn't do everything in the order as posted. Also, thanks again to Jodi, I shall be using Tacky Wax to hold the duvets in position when I take my next lot of photos.

Wednesday

Project: One Bed for Three (Part 3)

The next step was to make the mattresses. Following Jodi's instructions which she used to make Roz's mattress, but modified to my own requirements.

I used three layers of 5mm foam core glued together, then three layers of Minijumbuk Nu-Wool Quilt Wading on top of that, because I didn't have any batting. Before gluing the wadding layers to the foam core, I pre-drilled a series of holes as Jodi had done, for later tufting.


Next I covered the mattress with fabric. I didn't have any ticking in my stash, but I did have this pretty pink stripe which I thought would look okay.


After sewing the tufts, I made a bottom cover with cardstock. I didn't add and strip around the outside as Jodi did, because the mattress didn't appear to need it. It would also have made it difficult to add the fitted sheet and still have it sit comfortably in the bunk.

A big thanks go to Jodi for her inspiration and generous spirit, she made this project a whole lot simpler for me. 

Sunday

Project: One Bed for Three (Part 2)

After hubby cut all the MDF pieces for me I began assembling the bed trundle and bunks. Once again his tools came in handy to keep things squarely in place while the glue dried.


In the meantime I ordered these lovely decals from Amazon to decorate the bed once it has been painted. They are tiny, come in a set of ten different sheets and are perfect for decorating doll furniture.


All three pieces assembled, glued and ready for sanding.


The bunk bed ends cut, sanded and ready to be attached.


When I glued the the first bed end to the bunk beds,  I used clamps to hold everything in place until the glue set, before adding the second bed end.


All assembled and ready for painting. I debated between painting the beds white or grey, and finally settled on white. I thought the decals would be more clearly noticeable against a lighter background.


After painting and adding the decals.


Next project on the agenda is the bedding and before anyone asks, there is a ladder coming for the bunk.

Thursday

Project: One Bed for Three (Part 1)

Fitting three little kids into one small 1:6 scale bedroom where space was at a premium was really going to challenge my brain.

That is until I saw the large Badger Basket Trundle Doll Bunk Bed designed for dolls up to 20 inches, on the Badger Basket website.

Of course that bed would be far too big for my kids, hell, even a 1:6 scale bed is going to take up a whole heap of room. However, if I went a little smaller it wouldn't be so bad, and let's face it, these kids are hardly what you would call tall!

Speaking of tall, I realised this bed would need to be exactly that if I was going to fit their fat little heads under a bunk. I think I'm going to have to pull a Jodi and be a little creative with the size of this bed. 

Okay here's where I'm at ~ I've decided it will be 27cm long by 14 cm wide and 27 cm tall.


The next step was to make the head and foot template for hubby to use to cut the MDF.

Wednesday

Project: 1:6 Scale Art Deco Credenza (Part 2)

The assembly of the credenza is pretty simple. After the holes were drilled in three of the four pieces, I glued two of them together and allowed them to dry.


Then I glued the fourteen dowels, which had been cut 100mm long, in the double base before gluing on the top with the holes. Adding the top can be a little frustrating, because aligning all the dowels is a tad difficult to do with out swearing.


Once this was dry I added the other top without any holes. This is when it dawned upon me, I needed to cut two more panels. One for the front to go in between the top and bottom and one for the back to cover it completely.


After adding the front panel, I glued the ribbon onto the corrugated card, then attached it to the frame. The back cover was added last, this will keep the unit square and stop any racking.


All finished with knobs attached, top painted and trimmed, adorned with appropriate tableware. I guess a dining table with chairs will be required  next.

Saturday

Project: 1:6 Scale Art Deco Credenza (Part 1)

You may or may not know what a Credenza is, for those who don't, it's a cabinet used in the dining room to store china, crystal, linens, serving dishes and seasonal dining décor.

I have been giving this much thought, as my little Heather doesn't have a lot of furniture in her Art Deco home. In fact her room looks quite bare at present.

It's been designed it to coordinate with her settee and chair, complete with the ribbon trim. Below is the template I made for hubby to cut the top and base out of MDF.


I shall use dowels and fine corrugated paper to achieve the curved edges as I did on the Jazz Club bar. Then I'll add the purple, cream and gold Art Deco ribbon to complete the look.


Project: The Jazz Club Bar (Update)

After some thought, I made some minor adjustments to the bar. Now it can be used by the Integrity Toy dolls as I initially intended.


It was simply a case of making a base for both the bar and the shelves behind it.

Project: The Jazz Club Bar (Part 2)

It took almost a week for the new paint to arrive from Queensland, and I couldn't wait to finish what I started. The bar looks a lot neater now it's painted on the inside and the top has been varnished and properly trimmed.


I wasn't sure about the doors below the shelves, at first I thought they should be silver like the old bar fridges, but when I painted them I didn't like the way the silver looked. After repainting them gold, I reverted back to silver, but a different one that had a more metallic look to it.

There were 10 red wine bottles in one of the packs so I decided I needed a rack to store them. Out came the paper, pen & ruler and another template was given to hubby to cut for me (don't know what I'd do without him).

Here the bar is completed with bottles and glasses, just as I imagined it.

Friday

Project: The Jazz Club Bar (Part 1)

In case you're wondering what I've been up to lately ~ I've been making a bar for The White Panther Jazz Club.

I designed the bar and shelves behind the bar, made a carboard template and hubby cut the pieces out of 3mm MDF for me. The bar itself is made from MDF, dowels and the same fine corrugated cardboard which I made the Club's columns from.


I still need to paint the interior of the bar, apply some touch up and gloss to the "marble" top before I can say it's finished.

Initially I thought I had enough of the Folk Art Metallic Sequin Black acrylic paint to paint the shelves too. However, as luck would have it, I didn't. Then of course when I went to order more, it took some time to find a supplier who had it in stock.

I used a mylar mirror tile at the back of the shelves and doors need to be added, though these won't be working doors. The bottles on the shelves are from eBay, and I am also waiting on wine glasses and bar accessories to arrive.

Project: Hair

Some of you (those who follow my other blogs) may remember Miles (Nigel North Hot Shot), a musician appearing at a Club set in the 1920's. Unfortunately his long hair was not really suitable for the period.


In the 1920's, men were clean shaven and wore their hair mostly under a hat. However, beneath the hat hair was slicked straight back and with a centre or side part with the use of Brilliantine to give a high gloss.


I felt it was time I did something about it. Cutting a girl doll's hair is daunting enough, cutting a male doll's hair absolutely terrified me. Nevertheless, cut it I did, doing my best to keep it looking as it should and surprisingly it doesn't look too bad.


Putting the restyling off would have only delayed the rest of the story, which could have brought about the total demise of The White Panther Jazz Club blog altogether. This was something I never wanted to happen, I had put a good deal of effort into creating several dioramas around the characters in this story and am looking forward to photographing them looking as they should.

Thursday

Project: 1:6 Scale Art Deco Chair (Part 2)

I began this project some time back now, however, I couldn't finish it as I was waiting on some trim to come from Germany. The trim arrived whilst I was on holiday in Singapore, so it wasn't until I arrived home this week that I finally completed it.


The settee was made from a jewellery box (well it was actually a ring holder in the shape of a settee, which I purchased from AliExpress). It turned out much better than I thought it would.


To make the settee the right height, I cut a piece of wood to the same size as the settee base, glued it on before adding the trim and four jewellery box feet. Next I made a cushion for the seat, using gold brads for buttons, then some smaller cushions for the settee and chair,


This brought the settee to the same height as the chair and completed the overall look. The lighting from above makes the cushion & chair appear lighter than the trim, in actual fact the purple is a perfect match.

Monday

Project: Fireplace

I recently purchased another kit from Fairy Meadow Miniatures.  I assembled and painted it, not using all the pieces as I wanted to add my own personal touch. 

However, it didn't look complete, even after adding a fire and surround.


I achieved this by printing a photo of a fire which I downloaded from Pexels. This was printed this on gloss photo paper, then cut and glued it in place.

Using stiff cardboard I cut out the fire surround, painted it bronze (the colour was a mix of Folk Art Metallic Sequin Black acrylic paint and PearlEx Aztec Gold & Sparkle Gold pigments) and glued it on.

Next I added a few twigs, gluing them together and dabbing them with acrylic paint to produce a burnt look.


The top of the fireplace looked really bland, so I added a sheet of mirror film (this was purchased from eBay), but it still didn't look as I had pictured it in my mind.

It needed a frame, but I knew it would be impossible to find the right size, so I made my own using stiff cardboard and some braid I found in my stash.


Then I painted it, this time using Semco Metallic Gold Matte acrylic with more of the same pigments to create the right shade of gold.


It's not perfect, but I'm happy with the way it looks for now. I did order some gold sconces which I may or may not add down the track, depending how they look.


I wanted to see how it would look in situ so positioned the fireplace in a room which is still a work in progress . . . more on that later.

Project: 1:6 Scale Art Deco Chair (Part 1)

I've wanted to make an Art Deco chair for sometime, however it wasn't until I received a little gift contained in an Ice Cream Cup that it dawned on me ~ this little cup would make the perfect base for my chair.


The base will be covered with this velvet trim, once it arrives from Germany, and the legs will be gilded with gold leaf.