Welcome ~ please feel free to explore, there's lots to discover and I hope you'll come back often.
Showing posts with label Window by the Bay. Show all posts

Sunday

Project: Window by the Bay (Part 2)


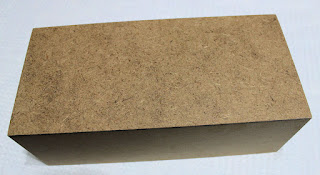
Yesterday hubby and I made the box seat from scraps of MDF. 9mm thick for each end, 6mm for front and back, 4mm for the top.


Length 26cm, depth 12cm, height 9cm. Scrap quad glued into each corner gives it strength and keeps it nicely squared.


It was glued and nailed with tiny brads, then left overnight.


Today I made the loose cover from a fat quarter of fabric. I simply laid the box on top of the fabric, trimmed it to size and cut a square out of each corner.


Corners were then pinned, tacked and fitted. Fortunately there were no adjustments to be made.


Then each corner was sewn and overlocked.


I turned the cover right side out, slipped it over the box, folded up the fabric so it was flush with the bottom of the box, then pinned and stitched the hem . . . finished!.

I had been debating about stapling the cover on, but making a loose cover leaves the option of changing it when ever the need arises and without too much trouble.


Here's the finished 3D set, complete with my Iplehouse KID modelling a newly knitted dress.

Thursday

Project: Window by the Bay (Part 1)

I haven't been sitting idle, I've been making a new 3D backdrop to photograph my Iplehouse KID's and my new Kaye Wiggs Mini dolls.

It all began with a piece of white corflute board (30.5cm wide x 42cm high) which has been sitting around in my studio since the year dot. I simply added an A4 print out of an open window with a view of the beach to set my scene. Of course you can adapt this easily . . . just look on line until you find a scene you prefer yourself.

I also found a length of 6mm dowel (it's amazing what I find hanging about in here) which hubby was kind enough to cut to 32.5cm, I will add a trim of some sort at each end to stop the curtains from coming off at a later date, like when I find something. :)

Searching in my stash I also found this pretty floral fabric to make a pair of curtains. It measured 25cm x the width. Beginning with the longest sides, I turned over 5mm, then a further 15mm, pressed with my iron and using my sewing machine, stitched along each of them. Then I turned over 5mm, then 35mm each of the short sides, pressed and stitched. (Normally I would have cut off the selvedge but I needed it for the length.) As these were to be the end I wanted the rod to pass through I made a casing by sewing 15mm down from each edge.


I put them on the rod, measured the length I needed, cut and hemmed them the same way as the heading. This left me with a small piece of fabric, which I made into a flounce to go in between the side curtains. By the time I stitched the head there wasn't a great deal of length left, so I added a row of lace.


I still have to make the seat to go in front of the window, but that will follow in a further post. I have a lovely green ticking which will coordinate nicely with the curtains, Here is what it looks like so far.


I may need to add some weights to the bottom of the curtains to get them to sit perfectly, as I used quilting fabric which doesn't drape well over a short distance. If you decide to try this yourself, I would recommend you use a softer fabric such as Japanese lawn.

(to be continued)