Welcome ~ please feel free to explore, there's lots to discover and I hope you'll come back often.
Showing posts with label Diorama. Show all posts

Thursday

Project: Mid Century Diorama - Atomic Age 40's-60's (Part 3)

"Atomic Age in design refers to the period roughly corresponding to 1940–1963, when concerns about nuclear war dominated Western society during the Cold War. Architecture, industrial design, commercial design (including advertising), interior design and fine arts were all influenced by the themes of atomic science, as well as the Space Age, which coincided with that period.

Atomic Age design became popular and instantly recognizable, with a use of atomic motifs and space age symbols." - Wikipedia

CAN YOU SEE SPACEAGE SYMBOLS IN THIS DESIGN?

Initially I intended to use the fabric above to recover the pink settee & chair set, unfortunately the print was far too large. The fabric I did use, although much simpler, does still suit the era quite well.

Saturday

Project: Mid Century Diorama - Space Age 50's-70's (Part 2)

Mid century modern is a term first used by Cara Greenberg in the 1950's to describe a style of architectural, interior, industrial and graphic design that emerged after World War II.

Today mid century modern is often used to refer to the period from the early 1930's through the mid 70's. It has become a standard way of referring to design of the period that featured clean lines, a fusion of organic and manmade materials and retro style.

Teak timber and plastics, graphic shapes and vibrant colours were often used and the style remained popular until the 1980's, when design philosophies like the Memphis design school came into fashion.


My "Space Age" diorama is showcasing the wonderful plastic furniture produced in the late 1950's through to the late 60's.


In these last two shots you can see the recent additions to this diorama. The occupants have remained the same . . . still munching on cake!


Later, I will share a second mid century version which overlapped this period of design.

Thursday

Project: Mid Century Diorama - Space Age 50's-70's (Part 1)

"The Space Age was an era of new military, political, technological and scientific developments, which began with the Soviet Union's October 4, 1957 launch of Earth's first artificial satellite, Sputnik 1.

The last major leap of the Space Age was the Skylab (1973) and Salyut (1971) programs, which established the first space stations for the U.S. and USSR in Earth Orbit following termination of both country's moon programs." - Wikipedia

Now, a little information about the people who designed the original furniture for the 1:6 scale diorama I'm working on.

TULIP ARM CHAIR
Year: 1957 Designer: Eero Saarinen for Knoll.

Finnish-American Saarinen was just as renowned for his work as an architect as he was for his furniture design. Known for his graceful flowing lines, Saarinen designs include the Gateway Arch in St. Louis and JFK International Airport’s TWA Flight Centre, as well as the Womb Chair and the Tulip Table and Chairs.

Saarinen’s famous Pedestal Collection was developed to clean up the “ugly, confusing world” of table and chair legs.  

BALL CHAIR
Year: 1963 Designer: Eero Aarnio for the Cologne Furniture Fair of 1966.

This isn’t a piece of furniture for fans of subtle designs. Another frequent star of sci-fi films and TV shows and an enduring symbol of the ‘60s, the Ball Chair might be a little dated compared to the rest of this list but it is undeniably fun. It is impossible to look at this chair and not smile, but again, its funky design also served a purpose.

Designer Eero Aarnio needed a large chair and set out to make his own. Aiming for a simple design, he ended up going with the most basic shape there is and created an icon in the process.

PANTON CHAIR
Year: 1967 Designer: Verner Panton for Vitra.

Today, plastic is generally not considered the most luxurious or rarest material around. But in the mid-twentieth century, plastic was still new and relatively fancy. So when Verner Panton designed a chair that was made entirely out of a single piece of plastic (the first time such a chair had ever been made) people’s minds were sufficiently blown. And the chair still looks great today.

Although plastic may have lost some of its lustre, the satisfying curves and gravity-defying stance of the Panton still turn heads well into the 21st century.

COMPONIBILI
Year: 1967 Designer: Anna Castelli Ferrieri for Kartell.

An icon of Italian design known all over the world, the Componibili (initially called Mobili 4970/84), was first presented in 1967 at the Salone del Mobile in Milan and reflects the idea that a design should not only be beautiful, but also functional.

Anna Castelli Ferrieri, an Italian architect and industrial designer, was the first woman to graduate from the prestigious Polytechnic of Milan. Anna was a pioneer in research and production of everyday plastic objects. In 1949 she founded Kartell together with her husband Giulio Castelli, in order to produce high-quality design products out of plastic.

Even now the Componibili is still among Kartell’s best sellers and it is exhibited in the permanent collections of the Modern Museum of Art in New York and the Centre Georges Pompidou in Paris.

Unfortunately the Componibili is not available in 1:6 scale and I couldn't find the right items to make one, so it's not shown in my diorama, but all the other pieces will be included.

Diorama Ideas

Now that I have my 1:6 scale room box, the idea of using it for the different dolls I own, makes me feel at peace with myself. For far too long I had a head full of ideas and nowhere to create them.

The "White Panther Jazz Club" almost made it when I began that blog, then again, "Fleur and Ruben" almost did too. However, having all those odd shapes of foam core which formed those dioramas constantly getting in my way, was beginning to drive me nuts! Using the room box to create both of them, as well as using it for the "Paris Apartment" and the "Kiddies Kitchen" makes sense to me. The room box walls are both reversible and interchangeable, so there will be less to store.


I asked hubby to cut me a new floor, which I will cover with the new black & white checkerboard tiles. This will serve for the Club's floor, but as it will also be reversible, I shall look for something classy to cover the other side which will suit my F&R boutique.

The furniture for these two dioramas is complete and I have begun making furniture for another room, I bet you cannot guess just by looking at this chair, what it's going to be.


I'll give you a hint, along with the walls which are coming, there is a ladder. :)

Wednesday

Project: Studio Apartment (Part 2)

This may well be the last post I'll be making before Christmas, but I thought I should let you see the diorama of the "Paris Studio Apartment" finished.

Well as finished as it's going to be at the moment . . . I'm still undecided about the pulls for the blinds and I need some miniature pampas grass or something similar to go in my large black urn . . . maybe I'll end up just finding something in my garden.

Friday

Project: Studio Apartment (Part 1)

For the past few days I have been working on a new diorama (using the kit room). A "Paris Studio Apartment" . . . and I have almost completed the Holland Blinds for the two windows. I still need to add either a ring or tassel to the bottom of the blind . . . however, I haven't made up my mind which will look better.


Of course no studio apartment would be complete without a number of cushions for added comfort. Quite a bit of sewing needed here, but these are now finished and ready to go.


It also required a bookshelf . . . so I used the plastic one from my IKEA Huset set and glued on a painted Crocodile board back panel to give it a fresh look.


Next I made some canvases to hang on the walls (using pictures found on Pinterest) which reflect the colours used throughout this diorama.


I'm still painting new furniture and sourcing final bits 'n' pieces, but it shouldn't be long before I can show you the completed diorama. I hope you like what I've shown you so far.

Project: Dioramas

It's been a little while since I last posted, for this I apologise. I have finally found a few moments to take photos of my diorama progress, though they are not the best. However, they will give you an idea of what I have been doing so far . . . and there's so much more to come.


This is the gold room, with a salmon coloured carpet which I have decided to use with another room in future. I am also working on a small half round side table with a pink marble top to go under the back window.


I'm happier with this carpet, though it's only made of paper as a test run. I will re-print it on fabric at a later date.


I still need to re-paint the skirting boards so they are nice and white like the window frames. I am really happy with the marble floor though. The gold and grey furniture is available in raw form from Fairy Meadow Miniatures.


With the room box walls reversed and the grey furniture which will eventually be used in my Fleur & Ruben diorama. The ice mint furniture below, was made from kits I purchased from Etsy.


You can see more clearly the garden scenes I have used outside the windows. I made these by using photos of gardens I found on the internet, printing them out on A4 paper then gluing it to crocodile board. Hubby made me wooden stands to slot them in, which is great, because I can change them as I need.

My models were my Kurhn Fashion Week Sweet Lolita and my Integrity Toys Poppy Parker™ Gardens of Versailles.

Project: Ideas for Making a Diorama

Many of us would like to have a room in the perfect scale to suit all our dolls, but not many of us have homes large enough to house them all. Personally I find dioramas in the 1:6 scale work best for me. But no matter what size you want to create, here are a few things that I have found make creating a room a bit easier.

Before beginning a diorama, I like to browse interior decorating magazines, paint booklets and home furnishing catalogues like IKEA publishes. I cut pictures out of the rooms I'd like to make and keep them in a folder to use for future reference. These help figure out furniture layouts and suitable colour combinations for my dioramas.

I've been working on a new diorama using a kit from Fairy Meadows, where the walls can be reversed and also separated for easy storage. I'm creating two rooms using different colour palettes, one cool, one warm. 

The faux marble floor has been completed, it's a neutral colour and compliments my two palettes, but contact paper is another simple option . . . there are some great patterns available which are suitable for both hardwood floors or tiles, the final choice will depend on which room needs decorating.


As my kit room came with a rear wall and two sides, I'm decorating all three walls in individual colours, then by placing alternate pieces of furniture and taking photos from two separate angles, I am able to make my photos look like they were taken in two different rooms.

For cutting the skirting boards at a 45° angle, I use my hubby's mitre box, but you can find reasonably priced small ones at Bunnings and Hobby Tools has a great little mitre set. It's also useful when making architraves, cornices and picture frames. This tool helps achieve a more profession finish on all the corners. 

When attaching wall art and other items like mirrors, I use a low tack painter's tape which can be removed without damaging wall surfaces (also available at Bunnings).

Suggestions:

Think about simple things that will create an interesting interior design i.e. I found some Perspex jewellery risers which I previously used as tables in an earlier mid century diorama. Train yourself to look at things you find in your daily life, to see how they could be used in a way other than for what was intended, i.e. place-mats can be used as rugs, an egg cup could be up turned to create a table base. The $2 shops are a great place to look for items that which can easily be utilised in this way.

When it comes to soft furnishings like curtains, bed linen or pillows, Spotlight has fat quarters of quilting fabric for a couple of dollars each. Many of these have tiny prints and they are usually arranged in blocks of colour, which makes it easy to select co-ordinating fabrics for each room.

When pulling it all together, make the room appear lived in and select items which compliment the story you are trying to tell with your dolls i.e. a small child's room may have toys on the floor, a bean bag in a corner, stuffed animals on the bed, a colourful bunting hanging on the wall or all four. Depending on the child your portraying, the room could be ultra tidy or completely messy.


The room above is a good example of a lived in lounge room, see the cardigan on the back of the chair, items on the coffee table, goblets on the side table and throw on the sofa.

And don't forget lighting, it plays an important roll when it comes to photographing your room/s. IKEA and Bunnings sell all kinds of LED lights that put off very little heat and can be used to great effect as concealed ceiling lights.

 I hope this post helps when and if you want to make a diorama of your own.
Saturday

Project: Mid Century Diorama (Part 2)

For those who wanted to see the 1:6 scale ball chair, here it is. It arrived yesterday and when I took it out of the box, I was surprised how much bigger it was than I expected. But when you think about it, it needed to be that big to fit a doll body in.

With adjustments made to the window so you can see the garden by moving it to the other wall.


And should your dolls want to cosy up, the ball chair will even fit two! 


It took me a little time to figure out how the foam cushions sat in the ball, but figure it out I did. I think the three soft cushions that came with the set were much smaller than they really needed to be to support the doll's back, so I will make some larger ones that will make posing the doll's easier.

If you would like one of your own, you may still be lucky to find one on eBay, but I warn you, they are not going cheap . . . just type in "Poppy Parker British Invasion Ball Chair" into Google.

Project: Mid Century Diorama (Part 1)

I am still waiting on many of the props for this diorama. But I thought it was time I showed what I have done up to date. Below, the tulip chair in 1:6 scale.


Ikea shelving from the "Huset" living room set of doll furniture and the desk is a cake riser.


Floor is denim fabric stuck to board with spray adhesive and the rug is micro suede. The window behind the desk will be changed shortly. I originally thought the beaded curtain would cover the blue and it didn't, so it looks like I need a window with a view behind the pelmet.

Monday

Photoshoot: Lonnie

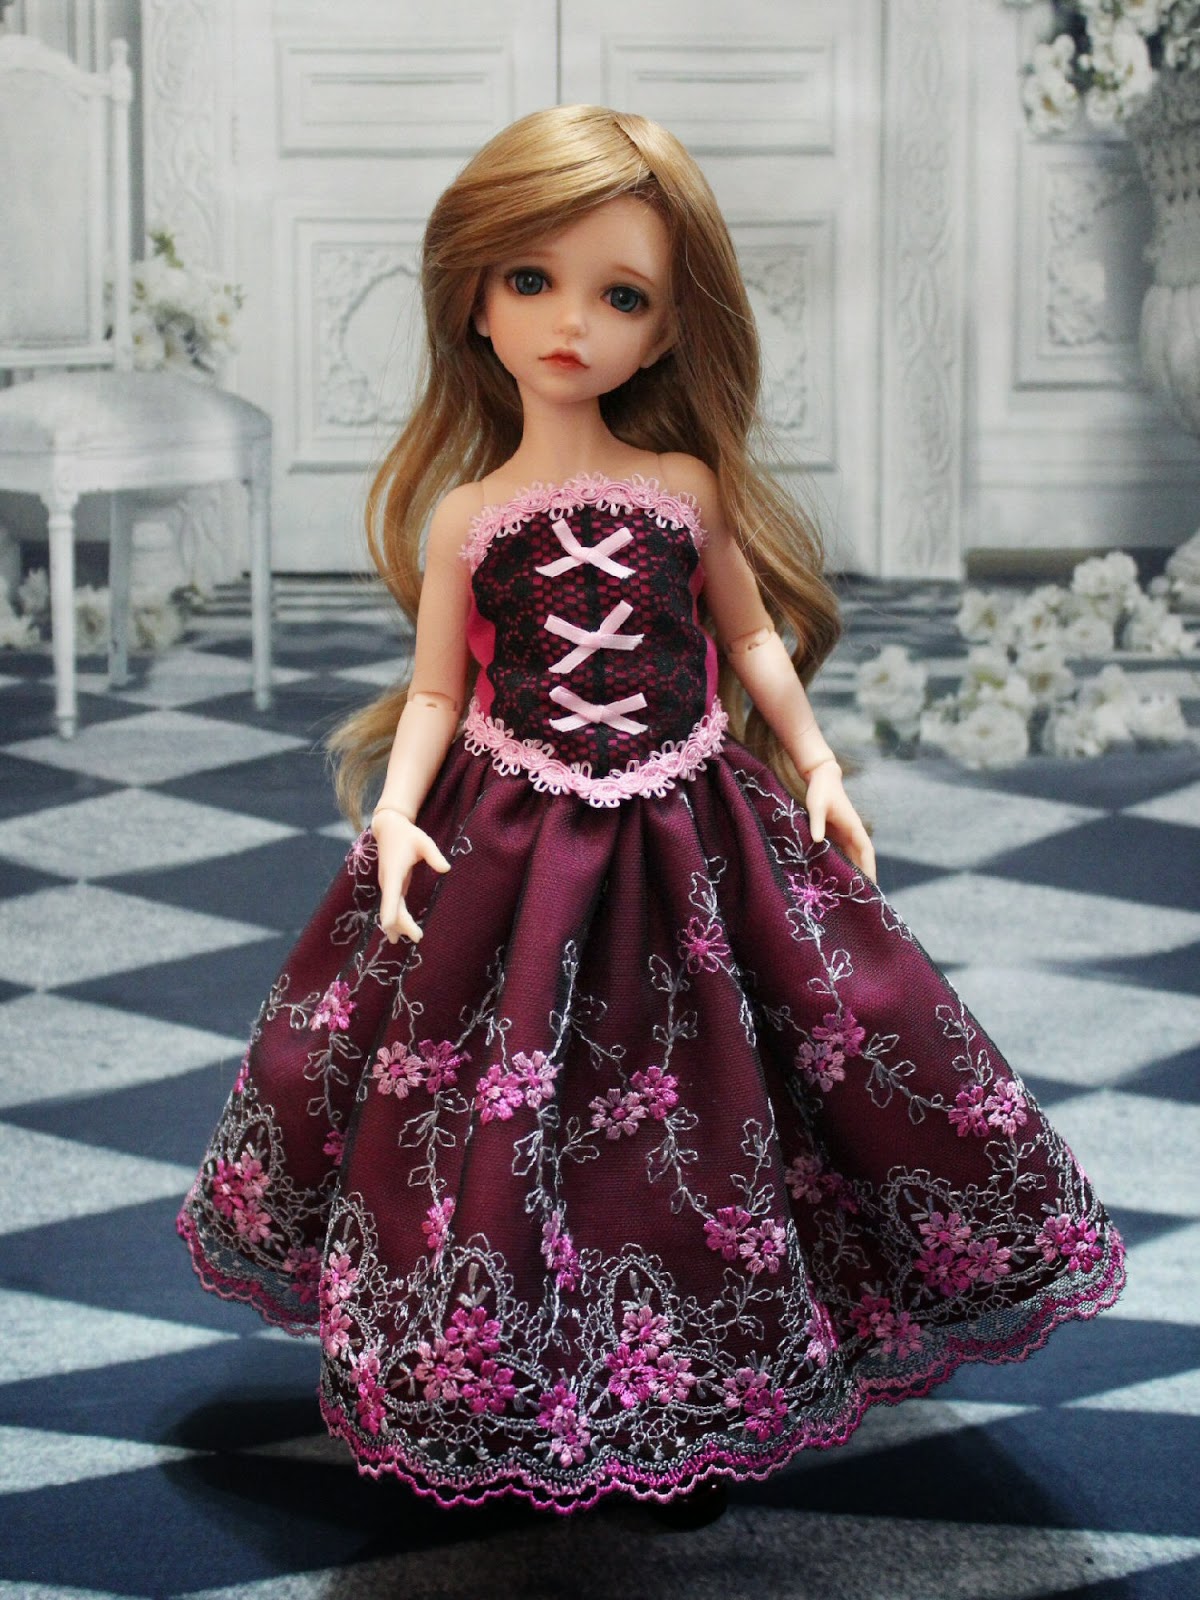
My new backdrops arrived last week and this morning I decided it was time I did a photoshoot of Lonnie in the beautiful black and white Ballroom.


I made her outfit myself, which is comprised of an underskirt, overskirt and soft style corset top.


Lonnie (Iplehouse KID) is a stunner and very photogenic. She may well be a KID, but she can look quite grown up in these clothes.


I'm happy with these photos, but it's probably due to the fact Iplehouse have gorgeous sculpts.